Using a GraphQL API in React
How to fetch data from an API using GraphQL in a React App

Of course everyone is familiar with REST APIs, but there is another type of API that is becoming increasingly popular and that is the GraphQL API. GraphQL is a data query language for APIs. The significant difference between GraphQL APIs and REST APIs is that in a GraphQL API, we explicitly indicate in our query which specific data we want to fetch and request. In a REST API, we get back all the data from a url endpoint. Thus, GraphQL saves us some time by giving us more control over which data we want to request and receive from the API.
The first time I encountered GraphQL was when I was learning how to create a Gatsby.js app; it uses GraphQL to access your app data. I’ve also attended a workshop where I learned how to build a GraphQL API using MongoDB and Node.js. Naturally, the next logical step in my GraphQL expedition would be to use GraphQL with a frontend library like, React.
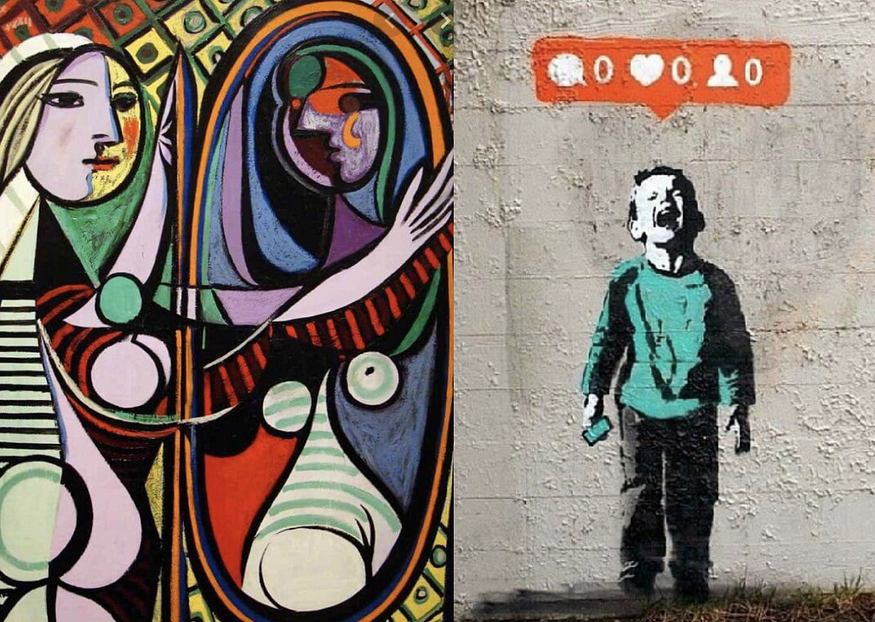
In this blog, I’ll be using a GraphQL API called Artsy. Artsy is a massive API and very fun to navigate through especially if you’re an art lover like me. The goal is to fetch all the artworks from two of my favorite artists, Pablo Picasso and Banksy, determine which artworks are for sale, and list their prices. All this data rendered on a React app. If Picasso and Banksy don’t really fit your tastes, you can choose from the other many artists in the database.

Getting Started
Create your React app
npx create-react-app art-graphql
cd art-graphql
Install GraphQL
npm i graphqlIn order for us to fetch data from a GraphQL API in React, we need to install Apollo Client. Apollo Client gives us a way to connect to our GraphQL data source and lets us execute GraphQL operations. Apollo Client also manages state and allows us cache our data on the client-side.
npm i @apollo/clientSet Up Apollo Client
The first file we are going to open is index.js. We need to import ApolloClient, HttpLink, InMemoryCache, and ApolloProvider from @apollo/client here.
Then we create a variable client, which is an instance of ApolloClient. This ApolloClient takes in 2 things: a link and a cache. The link is the connection to the GraphQL data source. Cache is the local data that is stored by ApolloClient. Anytime you make a request or send a query, it caches those results in the browser.
HttpLink takes in an object called uri, which will be the GraphQL endpoint, https://metaphysics-staging.artsy.net/.
cache is a new instance of InMemoryCache().
Next, we need to take the data from the client and pass it to the App component. The Artsy data we are getting needs to be accessible to all the components that are in the app. We have to wrap the App with ApolloProvider. If you’ve worked with Redux or Context, the wrapping of the provider will be familiar to you. We also need to pass the property, client, to the Provider.
Query the API
Now that we’ve set up ApolloClient, let’s open up App.js to prepare querying and fetching our art data.
Using GraphiQL IDE
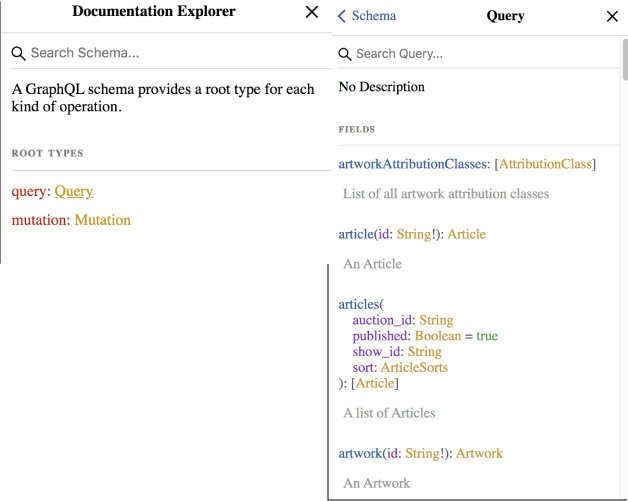
However, before we begin to code, we have to think about the query we need for our UI goals. Go to https://metaphysics-staging.artsy.net/ in your browser and let’s play around with this GraphiQL IDE. The left section of the IDE is where you will write your query. After you write your query, click on the “play” button at the top left. The right section is where you’ll see the fetched data after clicking “play”.
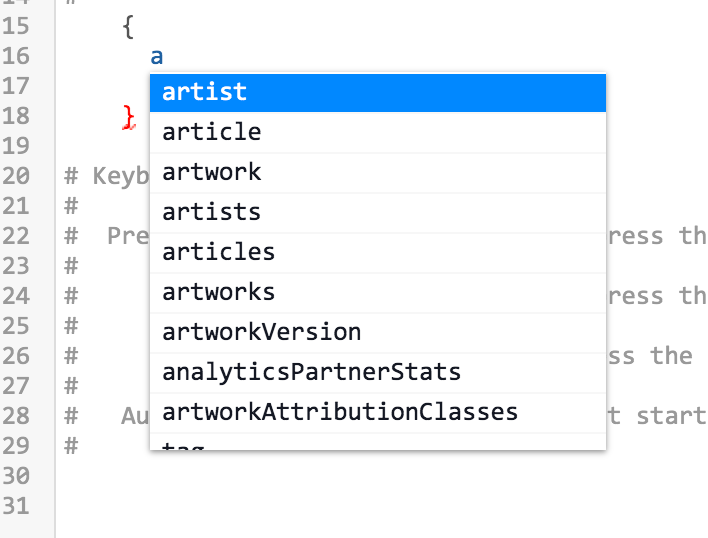
When you start typing in your query, you’ll see a dropdown menu appear with possible query variables to choose from. Instead of playing a guessing game with your query, you can look at the Documentation Explorer on the right side and click on query to view all the query variables.


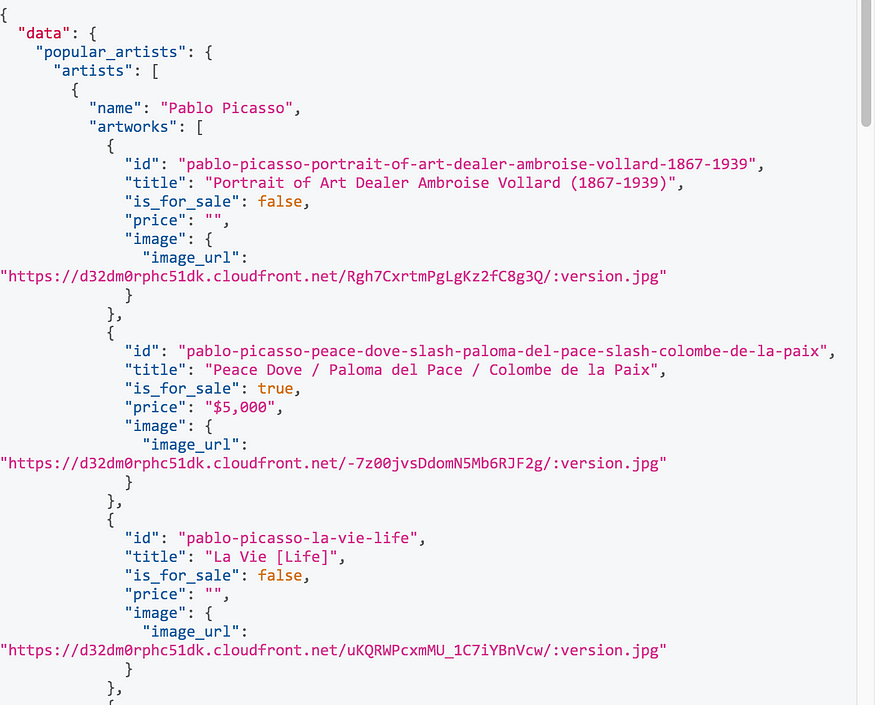
As a reminder, for our app, we need all the artworks of Picasso and Banksy, each artwork’s id, title, price, and for sale status. The final query will look like this:
query
 {
  popular_artists(size: 2) {
    artists {
      name
       artworks {
         id
          title
          is_for_sale
          price
           image {
              image_url
           }
       }
    }
  }
}
This is going to return a large nested object of arrays of objects (yes, you read that right) .

Start Coding in App.js
Since we know what query to use, let’s start on coding!
First, we need to import {gql, useQuery} from ‘@apollo/client’.
import {gql, useQuery} from '@apollo/client'Then, we will create a variable called query which will be set equal to gql. gql is a function that will take in the query string using tagged templates (a template literal that follows a function or rather, an expression that evaluates to a function). We get the query string by copying and pasting the query we entered earlier in the GraphiQL IDE.
const query = gql`
query {
    popular_artists(size: 2) {
     artists {
       name
         artworks {
             id
             title
             is_for_sale
             price
             image {
               image_url
          }
        }
      }
    }
 }
`
//The first 2 popular artists happen to be Picasso and Banksy. Thus, we pass in the argument "size" as 2.
useQuery is a hook that is React and Apollo’s way of sending a query and returning data. useQuery will take in the name of the query. If you console.log(query), you’ll see that we get something called “variables” returned, which is not what we want. To resolve this, we have to destructure the response from the useQuery call, a value called {loading}.
function App() {
const {loading} = useQuery(query)
Now, when you console.log(loading) you get back “true” then “false”. So, we have to handle the loading state in the app by saying:
if (loading) return <p>Loading Masterpieces ...</p>It’s very important to handle the loading state because when the app loads for the first time, the data won’t be there and it will error out.
Ok, we’ve covered the nooks and crannies, can we just grab the data already!?
Go back to the useQuery hook to also destructure data.
const {loading, data} = useQuery(query)Fetching and rendering the data
Remember the large, complex nested data object we get back from our query request? The main objective in this section will be to successfully traverse the object and render the target data in our app.
To grab the artist name, we need to do this:
const pablo = data.popular_artists.artists[0].name
const banksy = data.popular_artists.artists[1].name
To get the details for each individual artwork, we need to perform the map method.
<div class="ui raised cards">
{data.popular_artists.artists[0].artworks.map(work => (
<Popup
content="Click to View Details"
position='top center'
trigger={
<a id="pablo-card" class="ui card" href={`https://www.artsy.net/artwork/${work.id}`} target="_blank">
<div class="content">
<div class="ui large header">{work.title}</div>
<SaleIndicator is_for_sale={work.is_for_sale}/>
<div class="description">{work.is_for_sale && work.price === "" ? "Contact for Price" : null} </div><div class="description">{work.price}</div>
</div>
</a>
}/>
))}
</div>
Don’t mind the Popup and SaleIndicator components; they are primarily used for styling in the app. Popup is a Semantic UI React component to create a popup when you hover over each artwork card. SaleIndicator is a Styled Component that renders a green circle if the artwork is for sale and a red circle if the artwork is not for sale. I also used “link cards” from Semantic UI which allows us to click on the artwork card and it takes us to a link with more information about the artwork. Feel free to style your version of the app however you want!
The final App.js file looks like this:
| import React from 'react'; | |
| import './App.css'; | |
| import {gql, useQuery} from '@apollo/client' ; | |
| import {SaleIndicator, Circle} from './components/SaleIndicator'; | |
| import Banksy from './components/Banksy'; | |
| import { Popup} from 'semantic-ui-react' | |
| export const query = gql` | |
| query { | |
| popular_artists(size: 3) { | |
| artists { | |
| name | |
| artworks { | |
| id | |
| title | |
| is_for_sale | |
| price | |
| image { | |
| image_url | |
| } | |
| } | |
| } | |
| } | |
| } | |
| ` | |
| function App() { | |
| const {loading, data} = useQuery(query) | |
| if (loading) return <p>Loading Masterpieces...</p> | |
| const pablo = data.popular_artists.artists[0].name | |
| const banksy = data.popular_artists.artists[1].name | |
| return ( | |
| <> | |
| <section className="App"> | |
| <h1>BP Art Galleria 🎨</h1> | |
| <div id="sale-legend"> | |
| <h5>Legend</h5> | |
| <Circle color="green" selected={ true}/><p>For Sale</p> | |
| <Circle color="red" selected={true}/><p>Not For Sale</p> | |
| </div> | |
| <div id="pablo"> | |
| <h2>{pablo}</h2> | |
| <div class="ui raised cards"> | |
| {data.popular_artists.artists[0].artworks.map(work => ( | |
| <Popup | |
| content="Click to View Details" | |
| position='top center' | |
| trigger={ | |
| <a id="pablo-card" class="ui card" href={`https://www.artsy.net/artwork/${work.id}`} target="_blank"> | |
| <div class="content"> | |
| <div class="ui large header">{work.title}</div> | |
| <SaleIndicator is_for_sale={work.is_for_sale}/> | |
| <div class="description">{work.is_for_sale && work.price === "" ? "Contact for Price" : null}</div> | |
| <div class="description">{work.price}</div> | |
| </div> | |
| </a> | |
| }/> | |
| ))} | |
| </div> | |
| </div> | |
| <Banksy /> | |
| </section> | |
| <footer> | |
| <h6> © BP Art Galleria 👩🎨</h6> | |
| </footer> | |
| </> | |
| ); | |
| } | |
| export default App; |
import React from 'react';
import {query} from '../App';
import {SaleIndicator} from './SaleIndicator';
import { useQuery} from '@apollo/client';
import { Popup} from 'semantic-ui-react'

function Banksy(){
    const {loading, data} = useQuery(query)
  if (loading) return <p>Loading....</p>

  const banksy = data.popular_artists.artists[1].name

  return (
  <section className="banksy-section">
  <div id="banksy">
  <h2>{banksy}</h2>

  <div class="ui raised cards">
  {data.popular_artists.artists[1].artworks.map(work => (
     <Popup
     content="Click to View Details"
     position='top center'
     trigger={
    <a class="ui card" href={`https://www.artsy.net/artwork/${work.id}`} target="_blank">
    <div class="content">
    <div class="ui large header">{work.title}</div>
    <SaleIndicator is_for_sale={work.is_for_sale}/>
    <div class="description">{work.is_for_sale && work.price === "" ? "Contact for Price" : null}</div>
    <div class="description">{work.price}</div>
    </div>
    </a>
     } />
  ))}
  </div>
  </div>

  </section>
  )
}

export default Banksy
To add the Banksy artworks, create a separate file for the Banksy component and do the same thing we did in App.js. The Banksy component would look like this:
The SaleIndicator component:
import React from "react";
import styled from "styled-components";

export const SaleIndicator = ({is_for_sale = false}) => (
  <>
    <Circle color="green" selected={is_for_sale === true} />
    <Circle color="red" selected={is_for_sale === false} />
  </>
);

export const Circle = styled.div`
  border-radius: 50%;
  background-color: ${({ color, selected }) =>
    selected ? color : "transparent"};
  border: solid 2px ${({ color }) => color};
  border-width: ${({ selected }) => (selected ? "0" : "2")};
  width: 20px;
  height: 20px;
  cursor: pointer;
  float: left;
  margin: 0 4px;
`;
Final Product

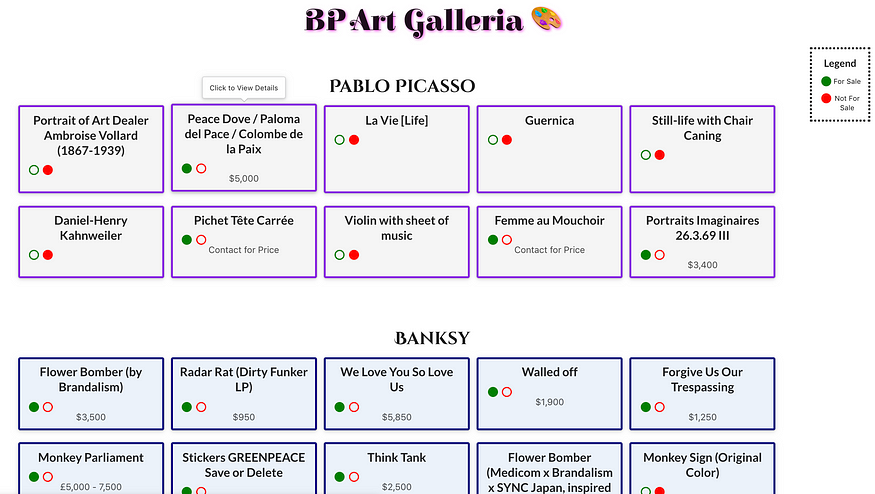
You can check out the app here: bpartgalleria.netlify.app
Hope y’all had fun learning how to incorporate Apollo Client and use a GraphQL API in a React app. It was definitely a new and refreshing approach as compared to the many times I’ve fetched from REST APIs.
See ya later! 💜
Comments
Post a Comment